
Weird Shaped Dialogs with No Title Bar in WinForms

It has been a while since I’ve done a programming post, so I thought I would do something silly (actually related to a real-life project, but taken to extremes).
Sometimes you want to have a dialog that isn’t a rectangle. This might be for a fancy splash screen or logon dialog with a logo, or just because you hate being conventional. Years ago there was a major vogue for music players that had weird shapes (and unusable interfaces). I’m not suggesting you rush out and build something unusable, but there are surely some reasonable situations where this makes sense.
Like, for instance, if you want a dialog shaped like a dinosaur. Because, why not? The picture at the top of the post is actually a dialog (if you look closely, you will see it has a label and a button on it (it is easier to see full size). Don’t believe me? Here is the dialog sitting on my desktop:
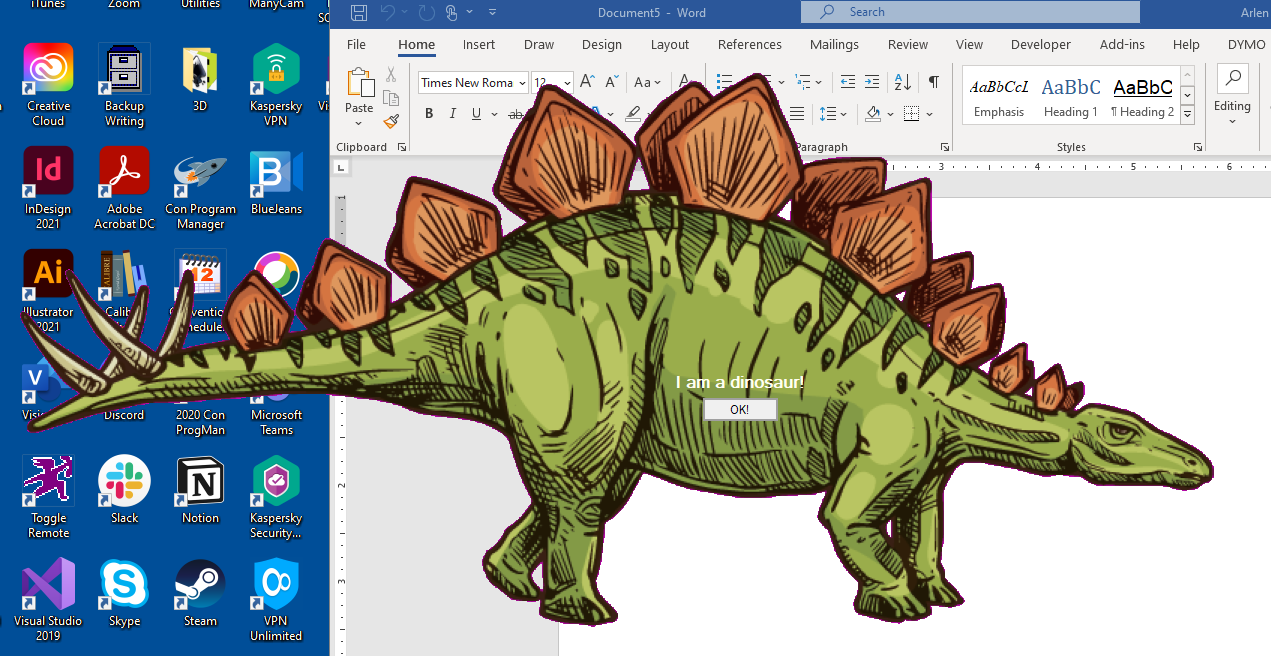
You can move it around by clicking and dragging anywhere on the dinosaur except over the controls (I won’t tell you how much time I spent just bouncing my dinosaur over my screens) and you can make it go away by clicking the OK button.
Basic Setup
The first step is to create an rectangular image that contains your shape. Everywhere that the shape isn’t should be a specific color–any color you like, so long as you don’t use it anywhere else. You can just use fill in your graphics program–or use a layer in a fancier graphics program if you are into that sort of thing! Here is my image:
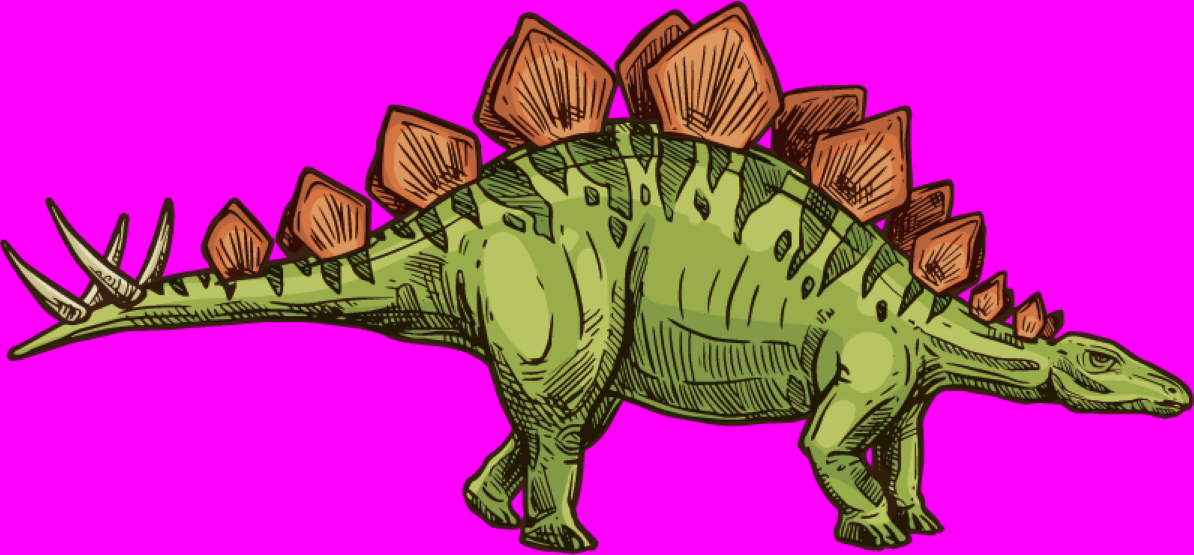
I used Magenta for my color.
Next, create a form in Dev Studio and set the BackgroundImage to be your graphic. You will also want to size your form so that the entire image fits, and set the FormBorderStyle to None to get rid of the title bar and the frame. Then, right at the very bottom of the Properties list, you can set the TransparencyKey to the color you used to indicate transparency:
![]()
If you run the app now, it will basically work. (Run it in the debugger since there is no cancel button on your form at the moment, so it will be hard to kill). But there are a couple of problems:
- This won’t work on all graphics cards or emulators — some users will see the big Magenta box around the dialog, some will get weird artifacts if they try to move it around. Parallels on the Mac is a particularly bad, but I’ve seen problems on lots of different machines.
- Unless you’ve done a really good job of putting your image onto the background, you will probably have little bits of your color showing up. That is because of anti-aliasing — in order to make your image look right, the edges of your shape may be slightly different versions of the color. (A good graphic artist can avoid this problem altogether, but it can take a lot of work).
Better Transparency Handling
There is another way to specify the area of the graphic that should be displayed — you can provide a Region, which defines exactly which bits of your form you want to show. Of course, you need a way to create a Region, and the code below has a method for looking at your image and creating the region based on the TransparencyKey color, but with a bit more flexible way of checking the color.
There is a Region property on your form, so in the constructor you can just do this:
public SplashForm()
{
   InitializeComponent();
   Region = CreateRegionFromBitmap(this.BackgroundImage, TransparencyKey, 10);
   TransparencyKey = Color.Empty;
}
The CreateRegionFromBitmap takes 3 arguments:
- The image to create the region from (for this example, I’ve put the method in the Form, but in real life, this would be in some sort of utility class).
- The color that is supposed to be transparent. Since the form already has a property for this, I just go ahead and use it, but note that I clear the TransparencyKey color right after that.
- The tolerance for the color – how close it has to be to the color above.
The CreateRegionFromBitmap method looks like this:
private Region CreateRegionFromBitmap(Image image, Color transparencyKey, int tolerance = 0)
{
  // We rely on the GetPixel method that is only available on a bitmap. If the passed image
  // is not a bitmap, convert it to one
  Bitmap bmp;
  if (image is Bitmap)
    bmp = (Bitmap)image;
  else
    bmp = new Bitmap(image);

  Region region = null;

  using (GraphicsPath path = new GraphicsPath())
  {
    // Step through all of the columns of the image and create 1-pixel wide rectangles as long as we can
    // that contain the image (vs. the transparent color) and add them to the path
    for (int x = 0; x < bmp.Width; x++)
    {
      int startY = -1;
      for (int y = 0; y < bmp.Height; y++)
      {
        if (IsColor(bmp.GetPixel(x, y), transparencyKey, tolerance))
        {
          // This is a transparent pixel. If this is the first transparent pixel after some non-transparent
          // pixels, then we can create a column rectangle of the bits we've just passed and add it to our path
          if (startY >= 0)
          {
            path.AddRectangle(new Rectangle(x, startY, 1, y - startY));
            startY = -1;
          }
        }
        else
        {
          // This is not a transparent pixel. If it is the first non-transparent pixel since we started
          // or since the last section, then store its start position
          if (startY < 0)
            startY = y;
        }
      }

      // If there is a line segment in-progress that runs to the end of the column, add a rectangle to
      // the path for it
      if (startY >= 0)
        path.AddRectangle(new Rectangle(x, startY, 1, bmp.Height - startY));
    }

    region = new Region(path);
  }

  return region;
}
So, what this code does is creates a Region made up of very skinny rectangles – all one-pixel wide – of the places where the shape should be. This might seem like a strange thing to do, but it is a trade-off between just building a region made up of all of the dots of the image (which will work, but then the drawing and moving of the shape will be really painful because of the complexity) and some super-fancy routine that figures out really efficient shapes within the drawing (which is hard and might be slow to create the Region and could have artifact problems if the algorithm isn’t perfect).
By the way – there is no particular reason why I went with 1-pixel wide rectangles vs. 1-pixel tall, except that in a number of the places where I’ve needed to do this, it required fewer rectangles. Ideally the routine would take a flag specifying which type of rectangles to create, but in most cases it won’t make a huge difference.
You may also have noticed the call to IsColor() in the method – this does a comparison of the pixel’s color and the transparency color using the tolerance that was specified. Here is that method:
private bool IsColor(Color color1, Color color2, int tolerance = 0)
{
  double deltaR = (double)(color1.R - color2.R);
  double deltaG = (double)(color1.G - color2.G);
  double deltaB = (double)(color1.B - color2.B);

  // Euclidean distance
  double euclideanDistance = Math.Sqrt((deltaR * deltaR) + (deltaG * deltaG) + (deltaB * deltaB));

  return euclideanDistance <= tolerance;
}
This calculates how close the color is by using a Euclidean distance formula–basically making a triangle of the three color elements (R, G and B). If you are wondering how I figured out this routine, the answer is I stole it from here. The article at the link also has some much fancier ways of comparing colors, but I wanted something that wasn’t too intensive.
I will say that, even with this fancy algorithm, I do still have a little bit of magenta on my dinosaur. If I were willing to spend a bit of time cleaning up the image, though, I could probably eliminate it.
One warning: Apparently the way that the Region is currently built will not work with the non-Windows cross-platform stuff that is available in .NET 6 and beyond (ex: when you create code designed to work on an Android phone). I haven’t played with that yet, so don’t have a good workaround.
Making Your Dialog Move
Since there is no title bar, you cannot currently move the dialog around (or close it, but I leave that as an exercise for the reader–I recommend a really obvious button, but to each their own!).
The following code will let the user just click and drag anywhere on the dialog that doesn’t have a control on it:
public const int WM_NCLBUTTONDBLCLK = 0x00a3;
public const int WM_NCHITTEST = 0x0084;
public const int HTCLIENT = 1;
public const int HTCAPTION = 2;

protected override void WndProc(ref Message msg)
{
  switch (msg.Msg)
  {
    case WM_NCLBUTTONDBLCLK:
      // Kill a Non-Client Button Double-click to avoid automatically maximizing the window
      // (Important that we don't call base.WndProc())
      msg.Result = IntPtr.Zero;
      break;

    case WM_NCHITTEST:
      // If the hit-test is for the regular form area, convert it to a title-bar area hit
      base.WndProc(ref msg);
      if ((int)msg.Result == HTCLIENT)
        msg.Result = (IntPtr) HTCAPTION;
      break;

    default:
      base.WndProc(ref msg);
      break;
  }
}
We are overriding WndProc so that we can handle some of the messages ourselves.
This is a fun bit of misdirection. All this code does is catch any sort of hit test message on the client area of the form and tell Windows to treat it as though it were a hit test on the caption bar. So if the user clicks and drags over the client area, Windows will think it is actually over the caption and move the dialog.
The WM_NCLBUTTONDBLCLK case is for handling a double-click on the “caption bar.” Normally, this causes the Window to be maximized, which does some weird things on our weird dialog. Note that for this message, the code can’t call base.WndProc().
All that is left is to come up with a dialog shape even more ridiculous than my dinosaur!
I’m so glad I came!
Dinosaurs!