3D Printed TARDIS
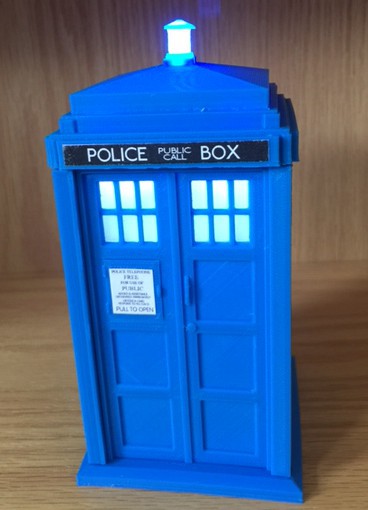 Although my general interest in 3D printing is based on designing my own models, I have printed a few pre-made models. This TARDIS model came from Thingiverse, and was created by a guy going by the name of Count Spatula!
Even though the model was already created, it was still something of a learning experience – both to see how different people design models, and also in the assembly and circuitry.
The model is designed using a number of separate pieces that need to be assembled. There are also some optional pieces to allow for holding some LEDs, a battery, etc. And there are some images for the signage. The finished model is about 6 inches tall.
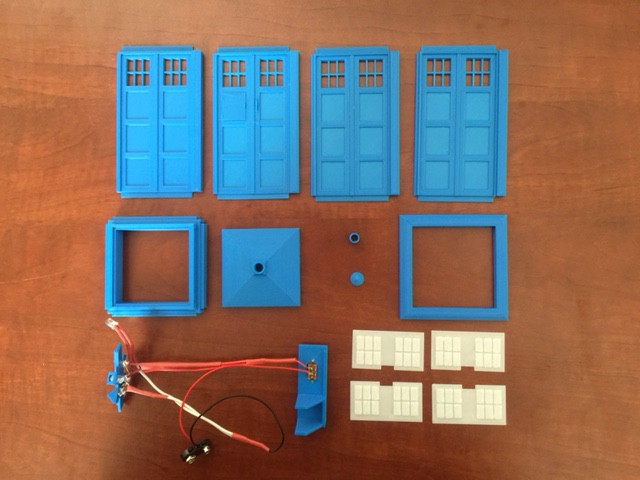
Here are all of the pieces of the TARDIS laid out before construction:
As you can see, there is a fair amount of complexity. The four sides (3 sides plus one front with door) slide into each other. The white pieces are the windows, which need to be glued in behind the openings. The top is made up of four pieces (including the light and light cap), and the bottom is the open square (so that you can access the switch).
There are also two specialized pieces – a light holder and a switch/battery holder. These are designed to slide into slots in the side panels, although in practice I had to Dremel the edges to make them fit. I’m not sure if that is just because of the vagaries of my printer, or a common issue. I think that next time I print one of these, I might print the holders a percentage or two smaller to see if that helps. I’m probably too lazy to remake the parts, although it would be a good exercise.
The entire thing took about 21 hours to print on my TAZ 5.
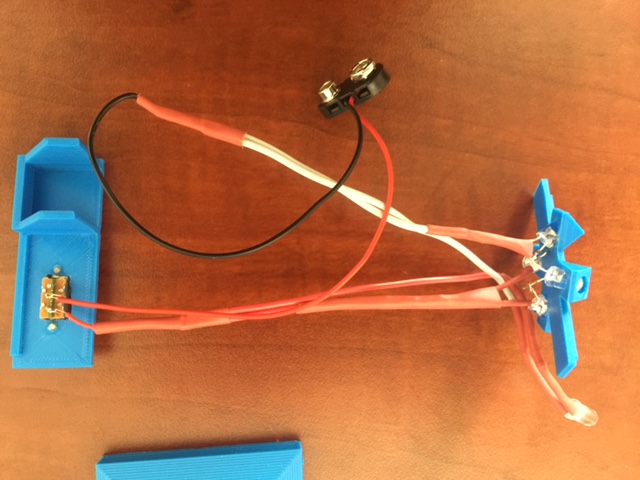
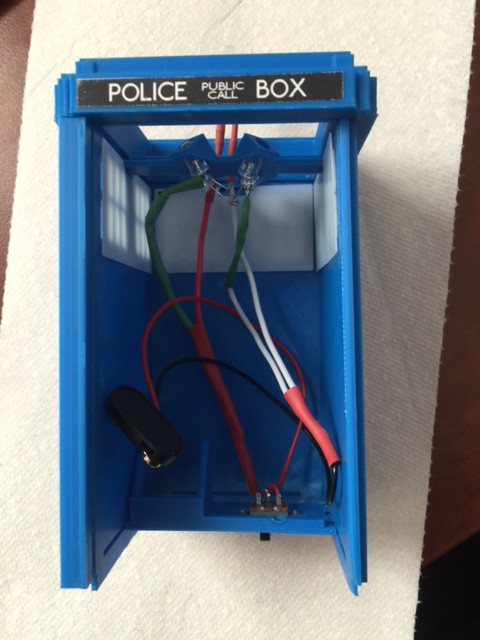
Although not explicitly described by the good Count, the light circuit is pretty straightforward:
I used some bright 5mm LEDs. Each pair of LEDs is hooked to a 330Ω resister, as is the single bulb for the top, although you can’t see the resisters because of the heat shrink tubing. I used some heavyish wire — partially because I had some lying around, and partially because it does a good job holding the top light in place without being glued. The bulbs in the light holder are glued in place though. I didn’t glue them in before soldering in case I smoked one, but it would probably have made soldering much easier…
The battery holder already had a hole for a switch (in fact, two different versions of the battery holder were included for different switches), but it didn’t work for the switches that I happened to have, so I used an x-acto knife to enlarge the hole. Again, I should probably have recreated the battery holder, but, remember–lazy!
Assembling the pieces is actually quite tricky–just to get everything lined up.
Here is the process that I eventually settled on:
- Slide the 3 sides together.
- Put on the top ring.
- Snap in the light holder, and super-glue it in place.
- Snap in the battery holder (but don’t glue yet)
- Bend the top light so that it is positioned more-or-less centered at the top of the TARDIS.
- Slide in the front panel.
- Slide on the base.
- Add the top pieces, sliding the top LED into the light shade.
- Put a battery in place, and then position the battery holder so that the battery is held between the holder and the side without rattling, then glue the battery holder into place.
I would counsel patience for this process – you don’t want to force and break anything, or screw up the circuit, and it is definitely tricky to get everything lined up. I would also test the circuit before gluing everything in place. For the labels, I just printed the provided images on a page-sized label and stuck them on.
Of all the things I’ve run on my 3D printer so far, this is the one that has got the strongest reaction. At this point, I’ve printed several (I did one without lights, then one with for me, and now they are turning into common birthday presents).
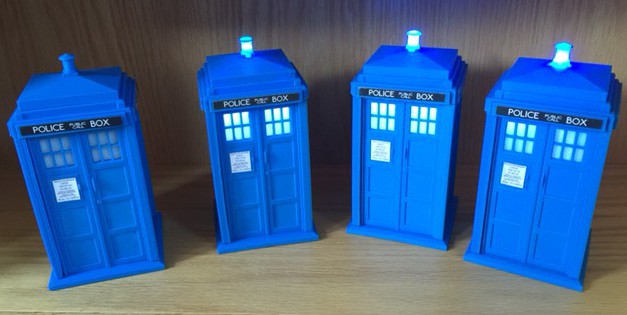
The next version I do will probably have a flashing light, and then I may move on to a decent dematerialization sound effect. I might also try printing a super-large model as well. (As I write this, I’m printing a baby half-size version just to see how that works).

Leave a Reply